Scribus (2) : Tools for text
In this tutorial we’ll see some more advanced features for textual content.
Text properties
Several options can be applied to the standard text and the text box itself, making it very versatile. In this tutorial we will work on the main features, applied to a small text box we have created with the text “Scribus 2nd tutorial”.
Color and shape
It’s possible to change some properties of the text box itself. For color, select the object and then go to the tab “Colours”, on the right. Select your color and it should be applied to the background of the text box. If you want some specific color, you’ll need to add it (Edit > Colours and Fills, check last tutorial for details)
The “Shape” tab enables you to customize the shape of your text box. Clicking on “Edit” in particular enables you to set custom positions to the vertices.
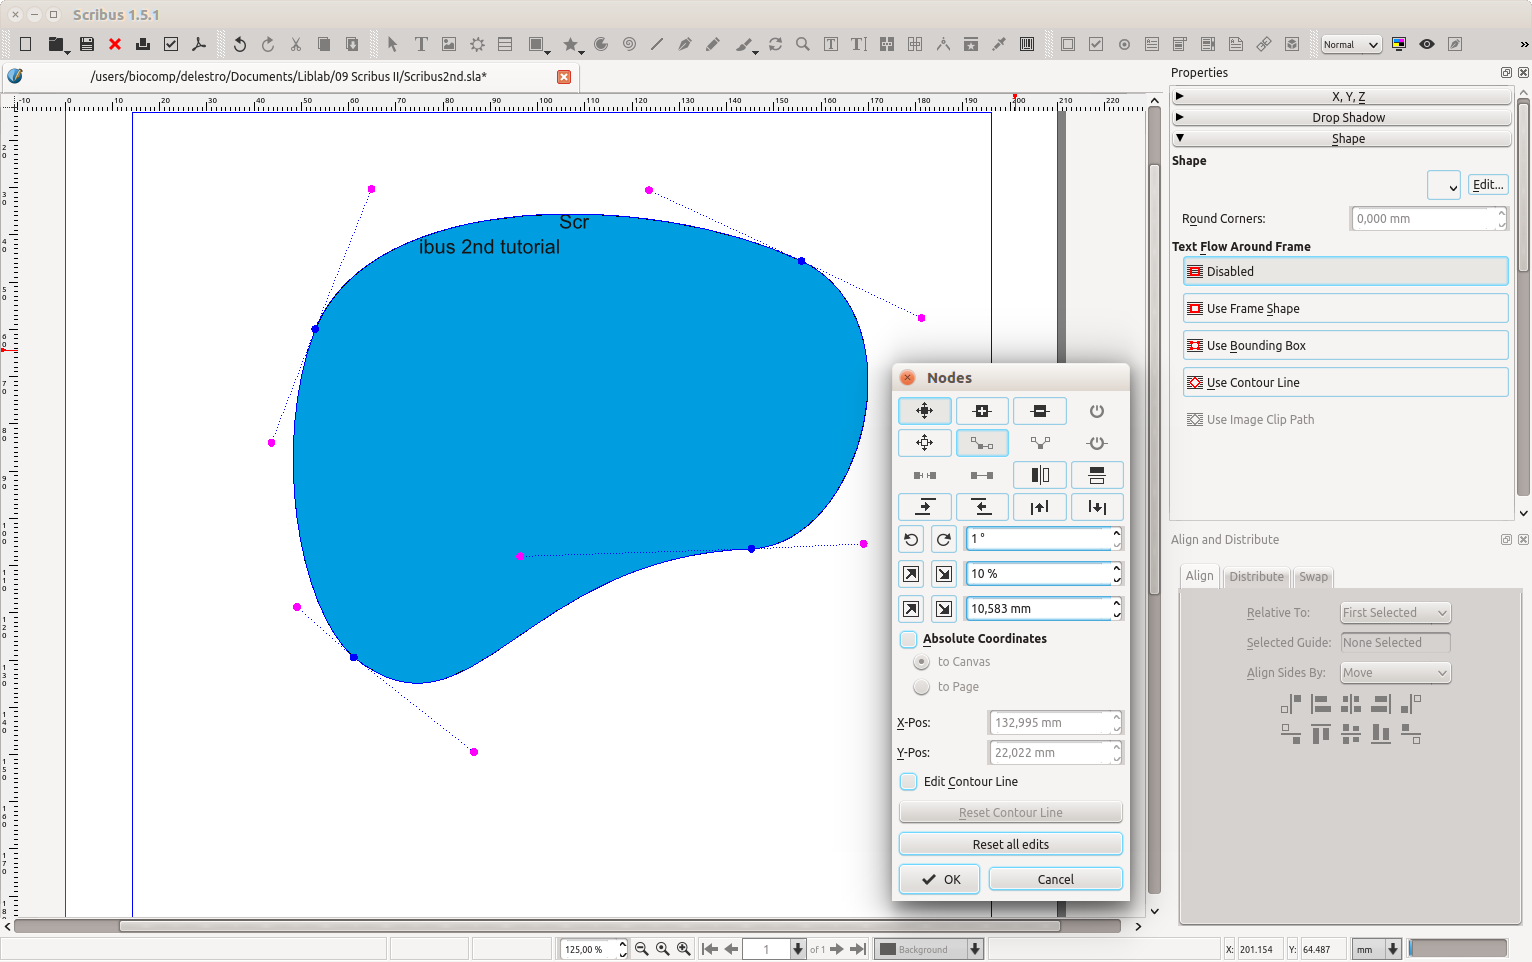
In the window that opens, the two main buttons to know are “Move nodes” (black square with arrows) and “Move Control Points” (white square with arrows). The first let you to set the position of the node, while the second is used to adjust the bezier curves.
By using the default square shape, you gain the option “round corners”, which lets you specify a radius for the corner, but this option isn’t available for other shapes. For the rest of the tutorial, we’ll work with a simple rectangular shape, with slightly rounded corners.
Text alignment
The common text alignment options (left, right, centered and justified) can be found by clicking on the text box and clicking on “Text” on the right bar (just below line spacing). You’ll notice that, if you center your text, it only centers horizontally. To center vertically, you need to go down to the “Columns & Text Distances” tab and choose “Middle” on the Vertical alignment option.
Colour & Effects
The first option is the color of the text, followed by the color of stroke and the text background color. Note that this background color is customized independently from the text box color. The buttons at the bottom are the following.
- Underline sentence. Click and hold for preferences on the displacement and width of the line.
- Underline words. Click and hold for preferences on the displacement and width of the line.
- Subscript
- Superscript
- All caps. This switches all the text to capital letters.
- Small caps. This sets the text in capital letters, but with the height of the upper or lower case.
- Strike out. Hold the left button for properties.
- Outline of the text
- Apply shadow
- Right to left writing
On our example we will only switch the final letters of the word “second” to superscript.
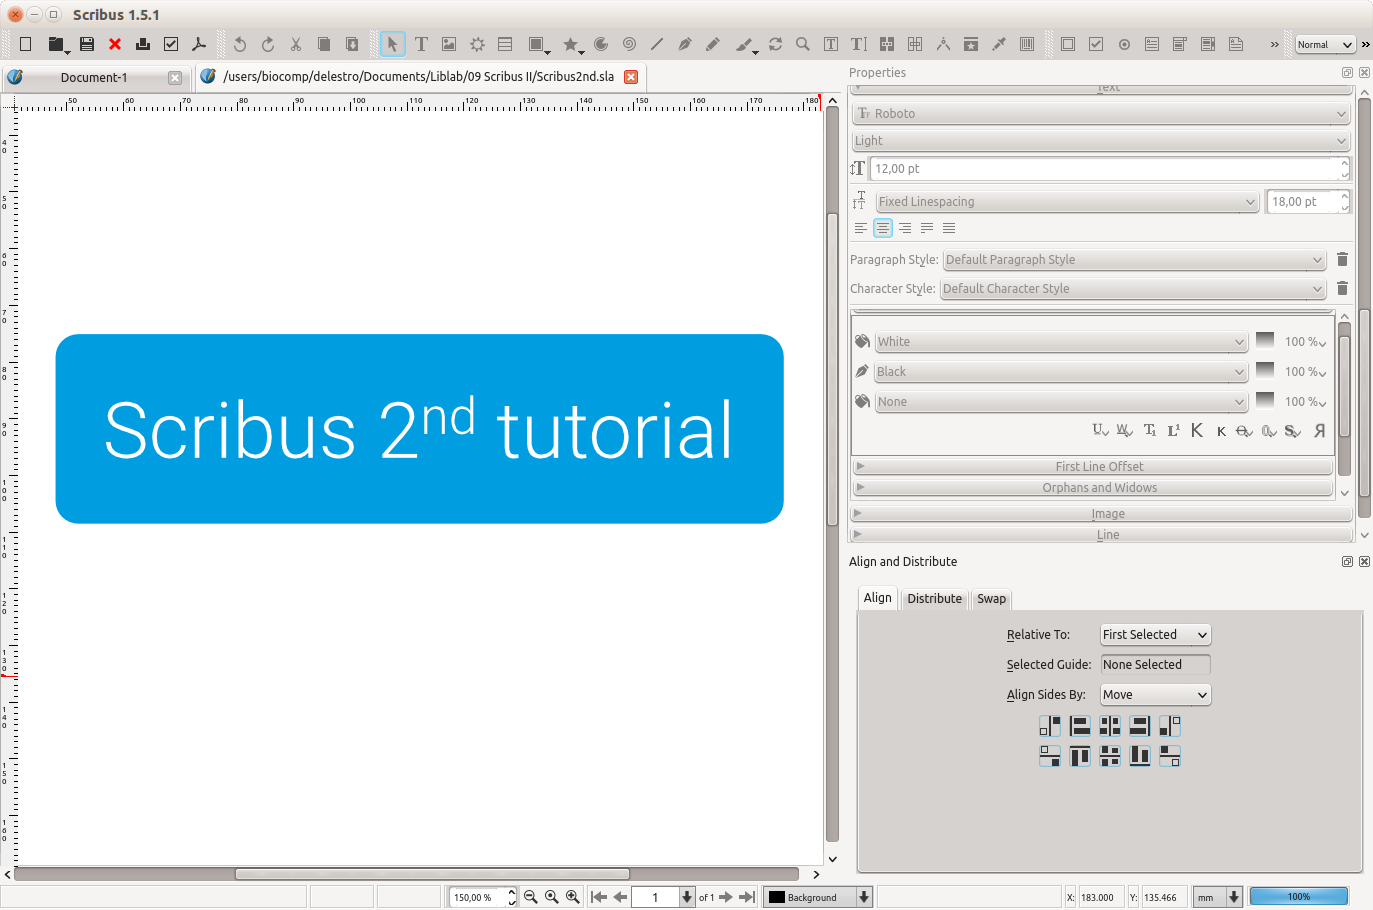
N.B: While you are in edit mode, there’s a thin line around the text box that isn’t a real stroke. To see how things really look like, remember to always check in preview mode, by pressing Ctrl+Alt+P.
Options for text blocks
Let’s create a square text box below this last one. Sometimes we need to start designing before we even have the actual text. For this type of situations, we have something called placeholder text, which is easily obtained by right-clicking on the text box and going to Content > Sample text. After choosing the desired language and number of paragraphs, click “OK”. There’s a traditional latin text used for this purpose, called “Lorem Ipsum”, that can be found at the bottom of the list.
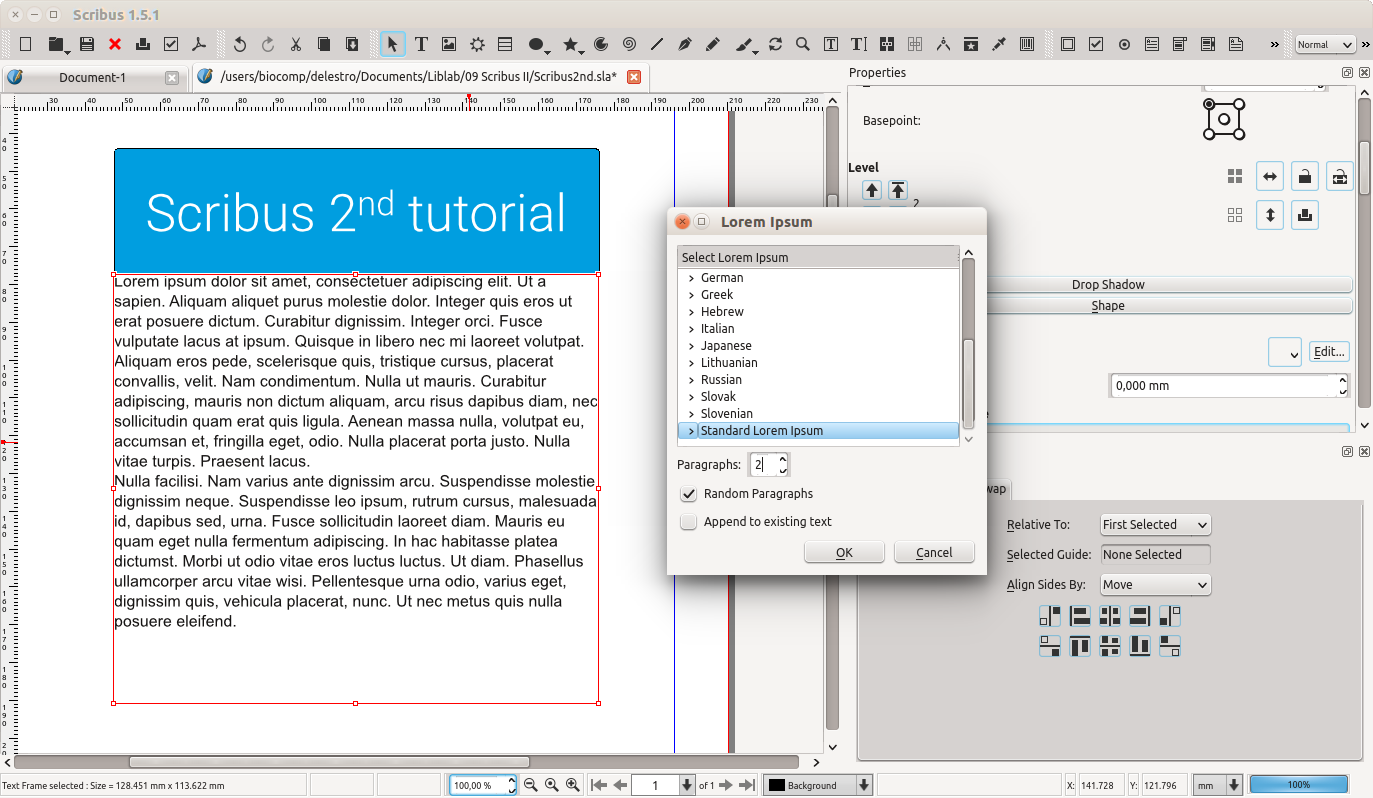
We can divide the text into columns by selecting the tab “Columns & Text distances” in the Properties menu. For example, let’s select 2 columns and a gap of 4mm between them. We can also set margins, using the Top, Bottom, Left or Right options. Let’s use a top margin of 4mm, so that there’s some space between the title and the text.

Text wrapping
Scribus allows us to wrap text around objects with high precision. To start exploring this, let’s first create a simple circular object (Insert > Shapes > Default shapes > Circle). Set your circle at the top of the text (you can hold the Ctrl key for a fixed circle ratio). In the properties window you may choose the color for fill and stroke of the object.
Now, select your circle and, in the properties, go to the tab “Shape”. Select the “Use contour line” option, and the text should wrap around your object.
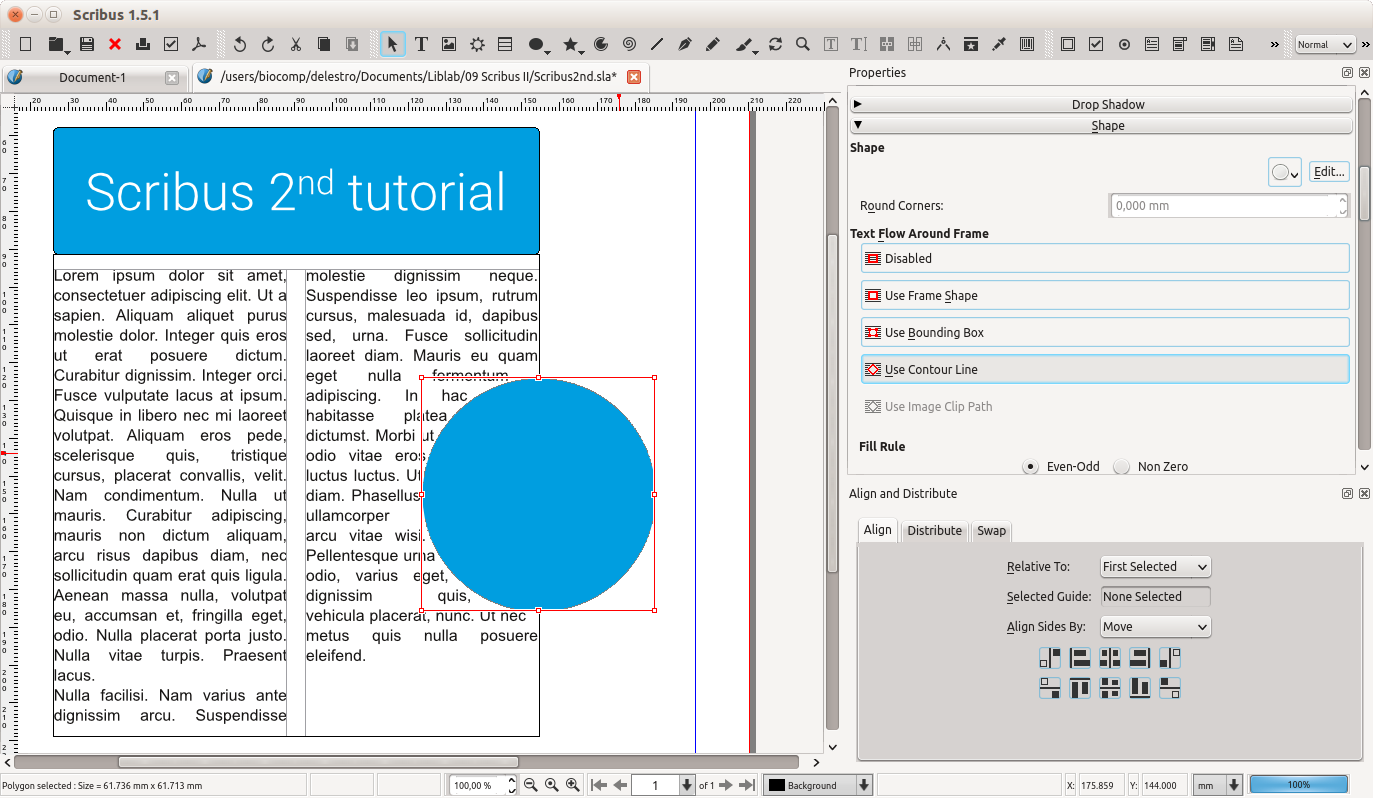
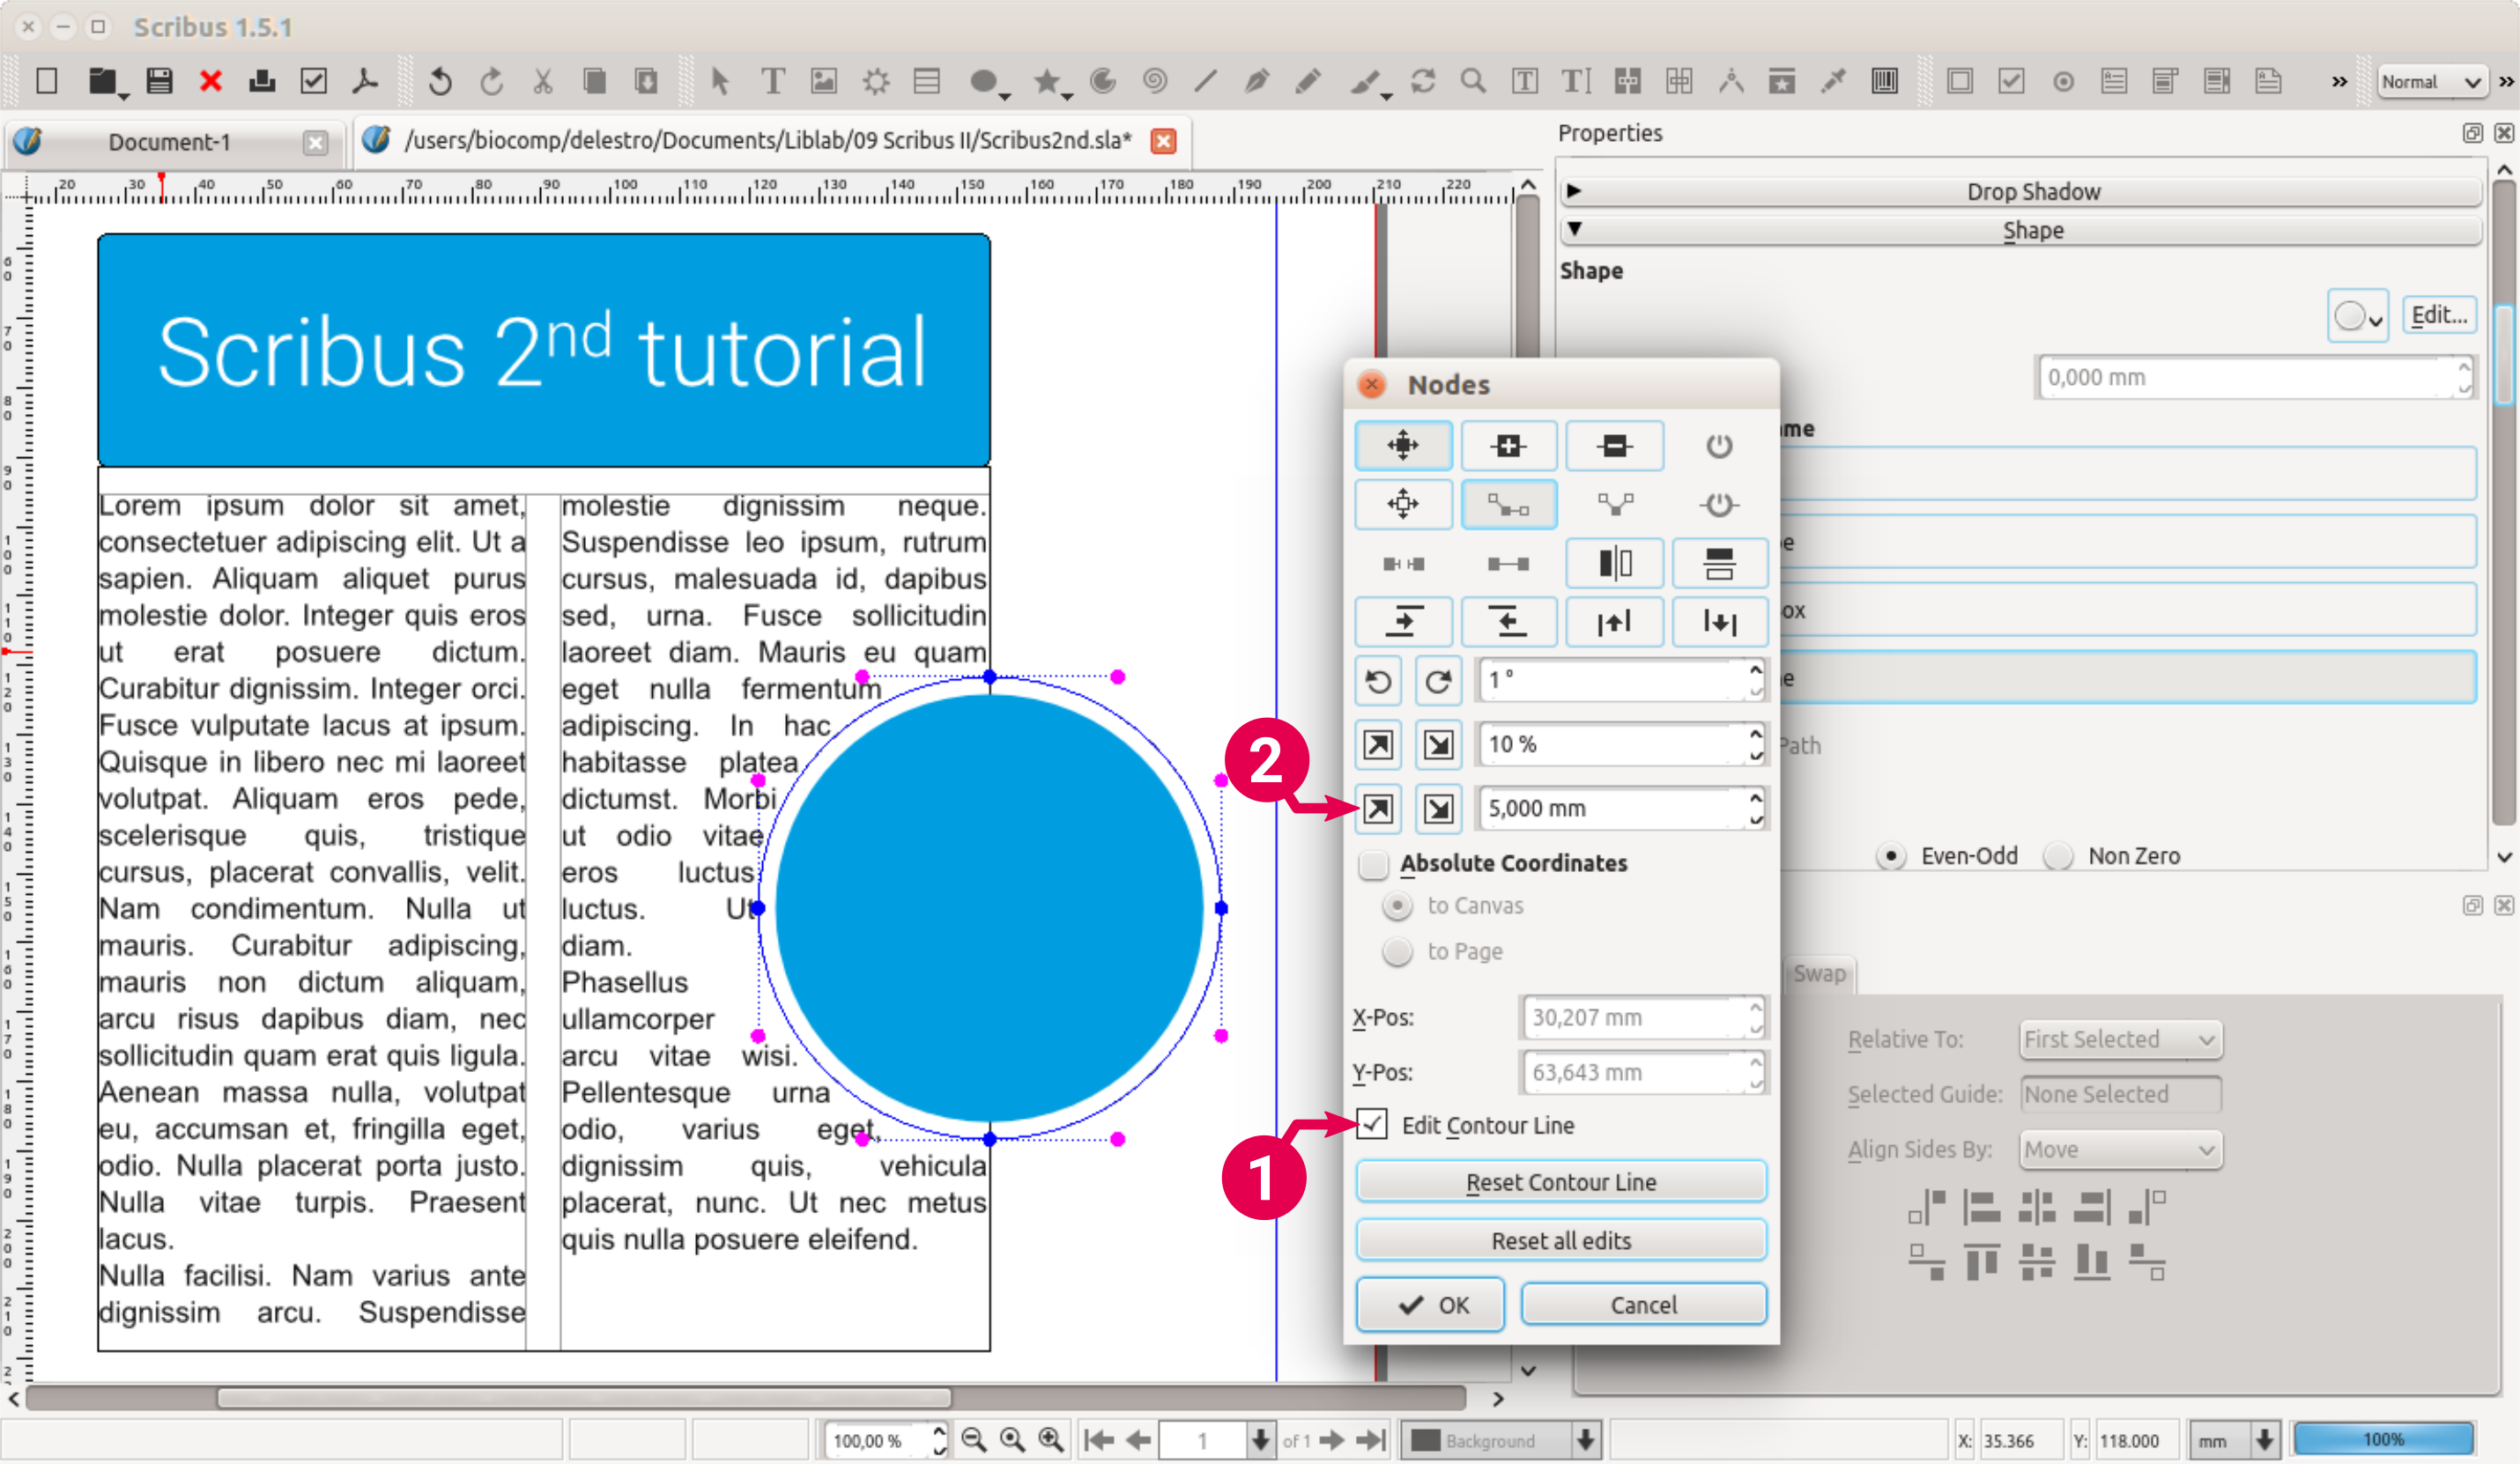
You may realize that there’s no margin between the object and the text. This can be adjusted by selecting the object and, on the “Shape” tab, clicking on “Edit”. In the window that opens, make sure to first select the option “Edit contour line”. Afterwards, click on the button with an arrow pointing up, meaning that the size will be increased by the given value to the right. The shape of the contour can also be edited freely, to match any need.
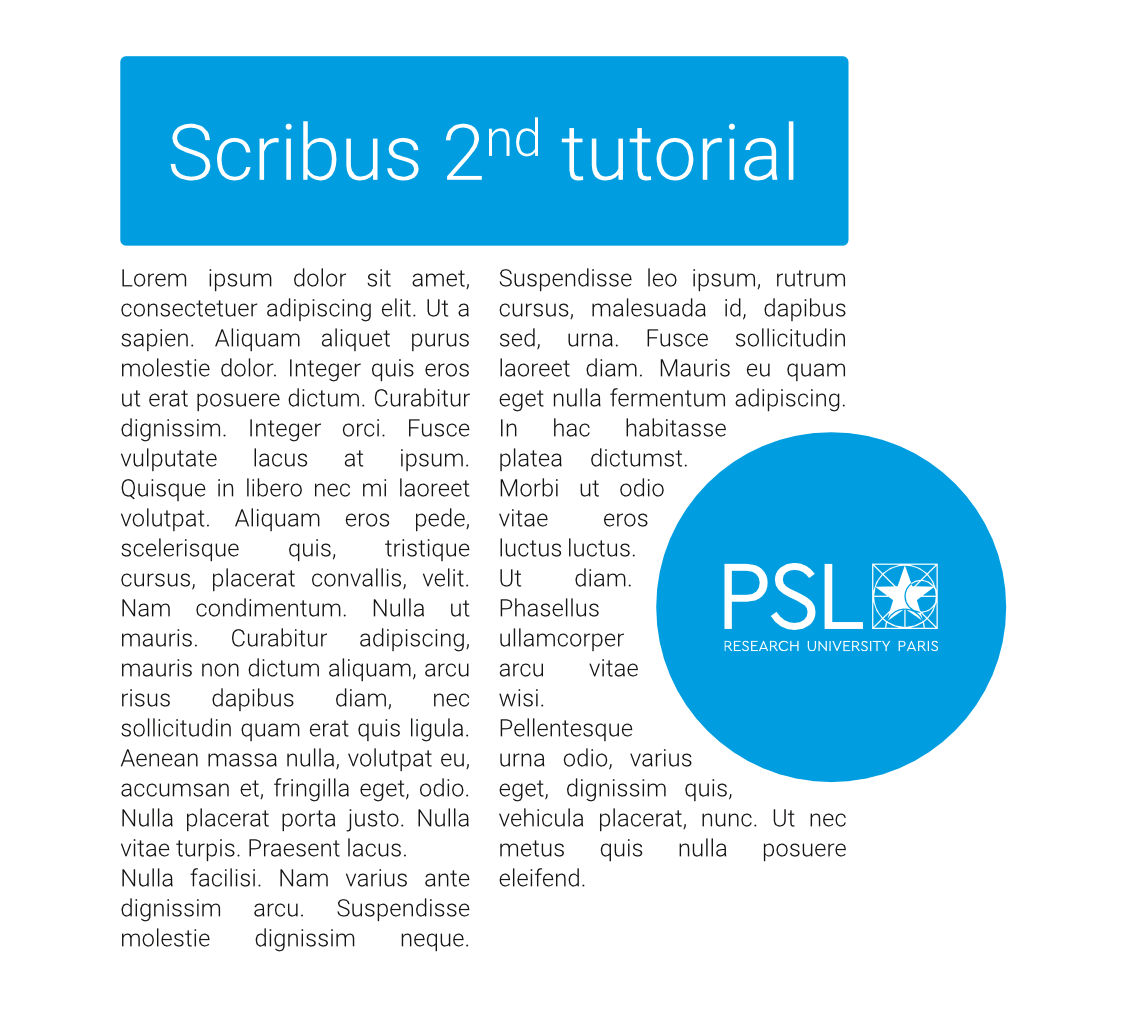
Objects like these, which intersect with the main text, are a good option for quotes or images, in order to attract the attention of the reader.
Exporting as a PDF document
If you’re willing to print your document, the best option is undoubtedly to save it as PDF. This allows for several adjustments so that you get the highest possible quality, without harming compatibility between different systems. To open the export window, go to File > Export > Save as PDF. Here you can tune the parameters of your PDF.
On the final version of your document, it is a good idea to select “None” for the compression method on the “General” tab. This may result in huge files, but you’ll be sure that nothing is lost in terms of quality.
Also, be sure to click on “Embed all” in the “Fonts” tab. For this example, I used a custom font called “Roboto Light”, and this makes sure that the font will be embedded in the PDF document, avoiding problems when printing.
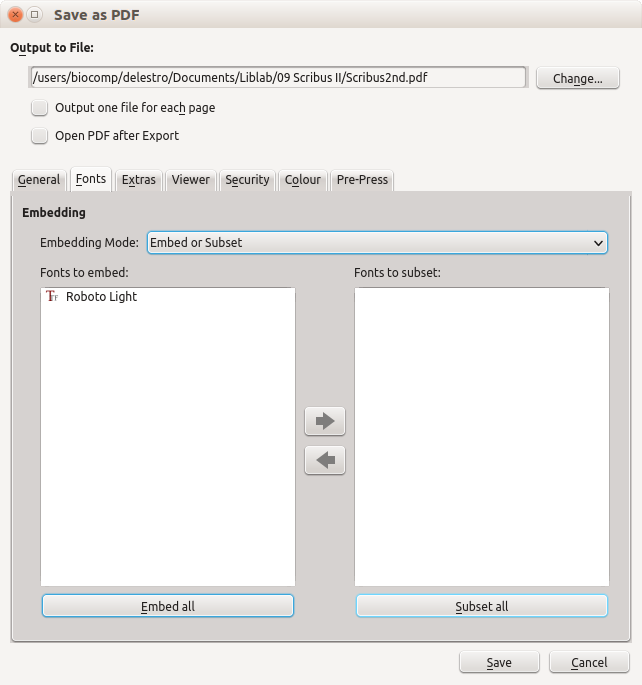
The standard output file uses the same path and name as your current .sla file, but to edit this, you can click on the “Change” button at the top of the window.
Other more advanced features can be adjusted, but these are the ones we need to know to ensure that the PDF will be printed without issues.
That’s it for now ! Scribus can be a really powerful ally for printed material, with really customizable tools.
Tutorial written by Felipe Delestro, PSL PhD student.


